
收音机功能/倒车后视功能 老款卡宴改装行影通车载DVD导航一体机实测效果图
 所属分类:GPS/DVD导航
2013-8-11 14:49:23 推荐指数:
所属分类:GPS/DVD导航
2013-8-11 14:49:23 推荐指数:
先上全车照,大红色,喜气,对车子还是比较爱惜的,所以看去依旧很靓丽。


 拔掉CD主机后面的尾线,拿下原车的CD主机。

 这个后盖板沟折腾的,拆开一看,全是铁卡。


 这个是导航接收信号的,到时安装在A柱里面隐藏。


分享下前几天新安装行影通车载DVD导航一体机和倒车影像的整个过程拍摄图片,花了6千大洋整的,前面主机装装看去挺简单的,但是安装后面倒车摄像头(倒车影像)遇到了不少麻烦,比较难装,最终搞定,感谢全体技术员们。安装后兼容原车方向盘,导航操作起来挺灵敏的,地图导航很准确,更多的就不多说了,上图要紧。
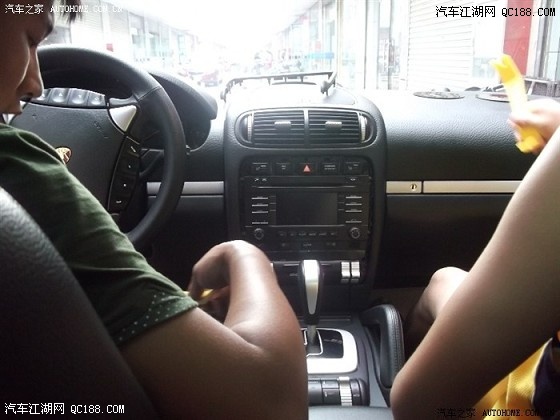
车保养的还行吧!
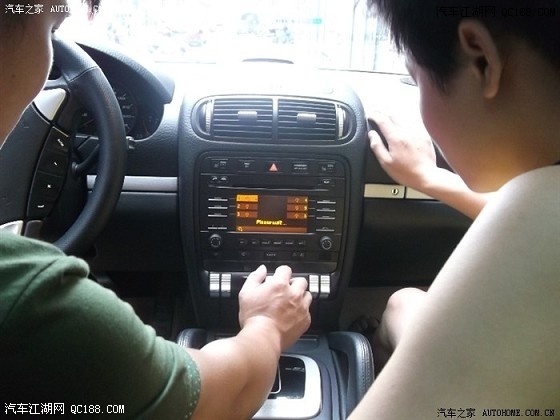
技术员们在体验原车的功能,取出光盘,原车是6碟CD。
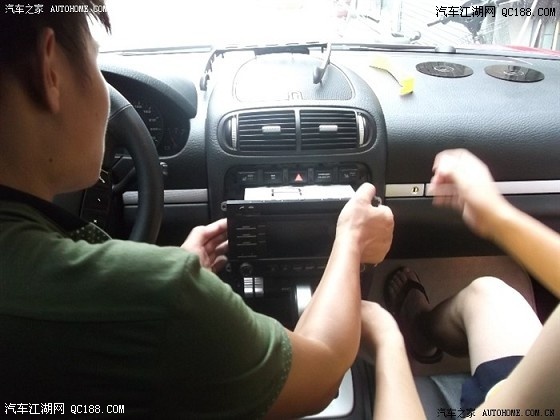
首先拆下的是原车CD主机外边框装饰。
接着就是拆原车CD主机。
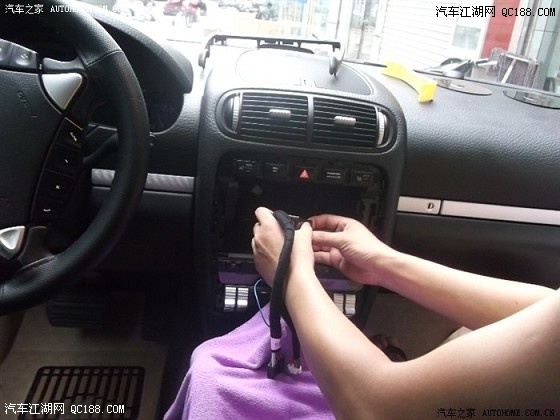
小心的挪出原车CD主机。
拔掉CD主机后面的尾线,拿下原车的CD主机。
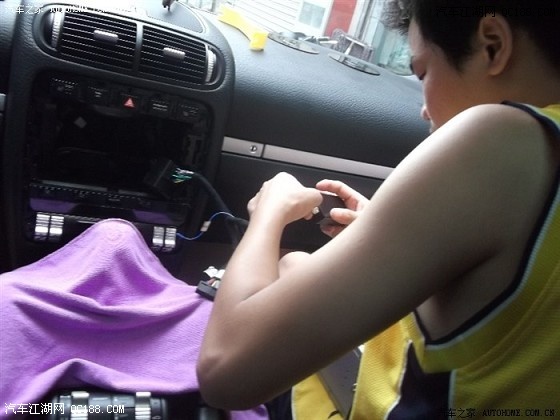
拿出和导航配套的专用线,直接对插上使用。
这个说是解码盒,和导航是配套的。
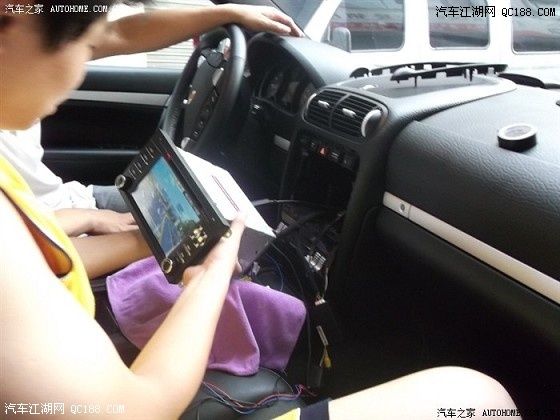
拿来导航一体机插上尾线。
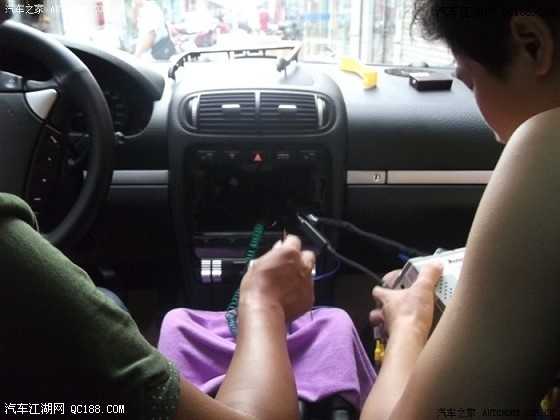
这个倒车影像的线,据说不接倒车影像,线也要拉到后面接上。
这个后盖板沟折腾的,拆开一看,全是铁卡。
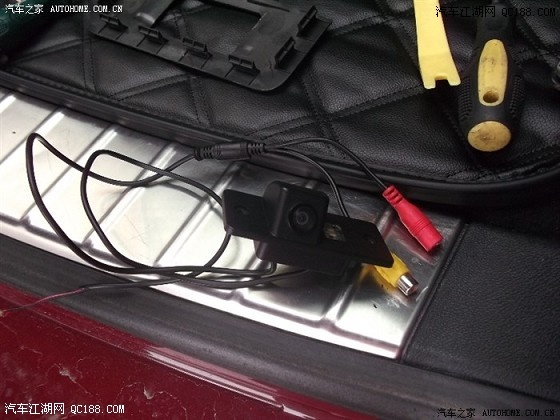
这个就是倒车摄像头,盖板拆好,装在拍照小灯那。
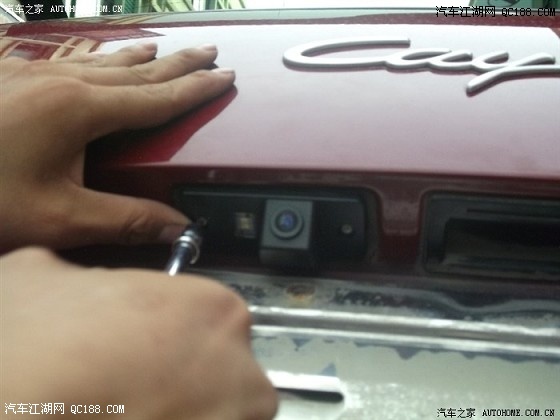
拆下原车小灯框,就2颗小螺丝固定的。
固定螺丝,用的还是自己原车固定小灯的螺丝。
测试GPS导航功能。
这个是导航接收信号的,到时安装在A柱里面隐藏。
技术员也拍照留念了。
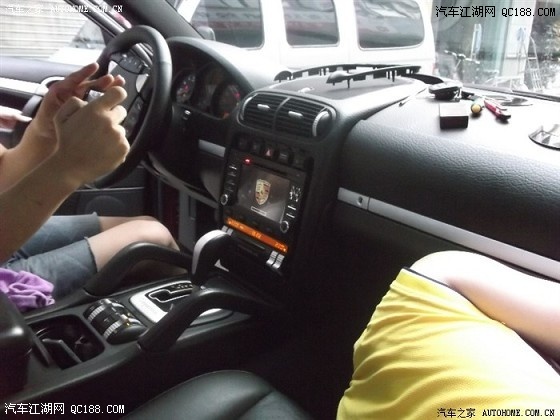
改装DVD导航后的效果图。
2013年10月24日
适用于SUV的轮胎型号繁多 锦湖Road Venture AT61是你最佳选择 由于SUV本身兼具游走都市和驰骋旷野的特性,并同时有良好的舒适性和安全性,让其近两年大行其道。但市面上适用于SUV的轮胎型号繁多,品质参差不齐,如何能满足中国道路条件下对轮胎的使用要求,也成为中国SUV车主亟待解决的问题。锦湖Road Venture AT61的推出就是要满足这种新的消费需求的.
锦湖Road Venture AT61中国 SUV用全路况轮胎
在胎面花纹设计方面,锦湖Road Venture AT61采用的仿生鳄鱼皮状胎面花纹提升了耐久性及复杂路面的操控性,并在花纹上...查看全文>>